Tuesday, January 15, 2008

Getting Started With POV-Ray

All the animations that I've developed have been created with the 3-D ray tracing program POV-Ray.

One of the best ways to learn about using POV-Ray is the documentation that comes along with the program. That documentation is also available online and in particular there is an excellent section on getting started.

Friedrich A. Lohmueller has a wonderful selection of descriptions, samples and examples for POV-Ray. In particular, his animation tutorial will certainly help the beginner get started.

Mike Williams has a number of galleries and tutorials. I continually refer to his Isosurface Tutorial when working with isosurfaces or using functions as texture maps.

Christoph Hormann has useful examples, tutorials, tools and include files relating to ray tracing in general, POV-Ray in particular as well as POV-Ray's unofficial enhancement, MegaPOV.

Finally, a sample POV-Ray file for a very simple animation to illustrate the essentials for creating a simple animation. Below is the source for the file simple.pov:
#include "colors.inc"    //this lets us use common color names
#include "finish.inc" //use some generic finishes

background{Gray} // set the color of the background

camera {
location <0,> //location in POV-Ray vector notation
look_at <0,0,0> //where the camera is pointed
}

light_source {
<-20, 40, -20> // light's position
color rgb <1,1,1> // light's color specified as a rgb "vector"
}

//hang a pendulum from the origin
union{ // it is a combo object, CSG fun

cylinder{<0,0,0>,<0,-4,0>,.1 // sphere start,end, radius
pigment{Blue}
finish{Shiny}
}

sphere{<0,-4,0>,.5 // sphere center, radius
pigment{Red}
finish{Dull}
}

rotate z*30 // the vertical tilt of the pendulum
rotate y*clock*360 // swing it around in a horizontal circle
// DYNAMIC with clock variable
translate y*2 // lift it back into center of view

}
which is run with the following ini file simple.ini
; POV-Ray animation ini file    ala Lohmueller 
Antialias=on

Antialias_Threshold=0.2

Antialias_Depth=3

Input_File_Name=simple.pov

Initial_Frame=1

Final_Frame=30
Initial_Clock=0

Final_Clock=1
Cyclic_Animation=on

Pause_when_Done=off

and then sewn together using virtualdub to produce this animation:


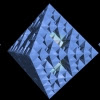
A simple version of the conical pendulum.

Sunday, January 6, 2008

An Introduction

This blog is an experiment. Actually, an experiment about an experiment. It is an outgrowth of an informal project that grew in response to the encouragement of friends, colleagues and students. I have no idea what the response may be or who might make up my audience, so I'm sure the blog will evolve in response to whatever feedback I get.

This blog is about computer animations, their creation and use in the classroom. It will also cover many technical aspects of the process by which the animations are created, so that even if no one else reads it, I can use it as a technical diary. This blog will also be in part about what I find satisfying about the creative process that goes into making a short animation.

I teach introductory physics and astronomy, and as such I am very aware of the need for visual aids for my students. Since many of the topics are dynamic, it seemed obvious even very early on in my teaching career that dynamic visual aids would be an asset. I few years ago, I discovered a wonder 3D graphics program called POV-Ray, when used with VirtualDub, that opened a whole a wide door to the creation of 3D animations for use in the classroom.

One of the first animations I created dealt with a problem scenario that students faced in mechanics when dealing with circular motion. A diagram in the text is a static figure, and the students would look at the figure and mentally toss out the fact that the object was actually moving in a circle and hence accelerating. The conical pendulum (a mass suspended from a string swung in a horizontal circle) is a great example. To help the students see what was going on, I created the following animation: (original animation here)


In the classroom, I use looping mode when playing the animation so that it cycles over and over. The students can see the dynamics of the scenario while we discuss the physics. I can pause the animation at the particular frame where the animation matches the static diagram from the text.

While the advance in curricular materials may have been incremental for my students, it was revolutionary to me. Over the last few years I've created about 200 short animations on a variety of topics. I have received pretty good reception of the project from friends and colleagues at my local institution as well as regional and national meetings of the AAPT. I also continue to find the creative process itself very satisfying.

I' ll wrap this up here. My next post will be a survey of what I think are the most important and useful tools and tutorials for those similarly inclined to get started.